Configure Plugins with JCasC

This blog post is for anyone interested to know how to configure a plugin using the Jenkins Configuration as a Code (JCasC) plugin, more specifically, this blog will guide you to get the YAML equivalent of a plugin’s configuration and use it to do some changes to the plugin without using the Jenkins UI.
If you’re a beginner at JCasC and want to learn more about it, you can head over to the following resources to understand JCasC better:
Brief Introduction to jenkins.yaml file
-
The
jenkins.yamlfile contains the configuration of the Jenkins instance in YAML format. The JCasC plugin refers to this file to configure the Jenkins instance. -
The default location of
jenkins.yamlis$JENKINS_HOME/jenkins.yaml, from where it can be fetched into the Jenkins server whenever you apply a new configuration. -
Download your
jenkins.yamlfile by going toManage Jenkins>Configuration as Code>Download Configuration. -
Make sure this file is saved at location
$JENKINS_HOME/jenkins.yaml. -
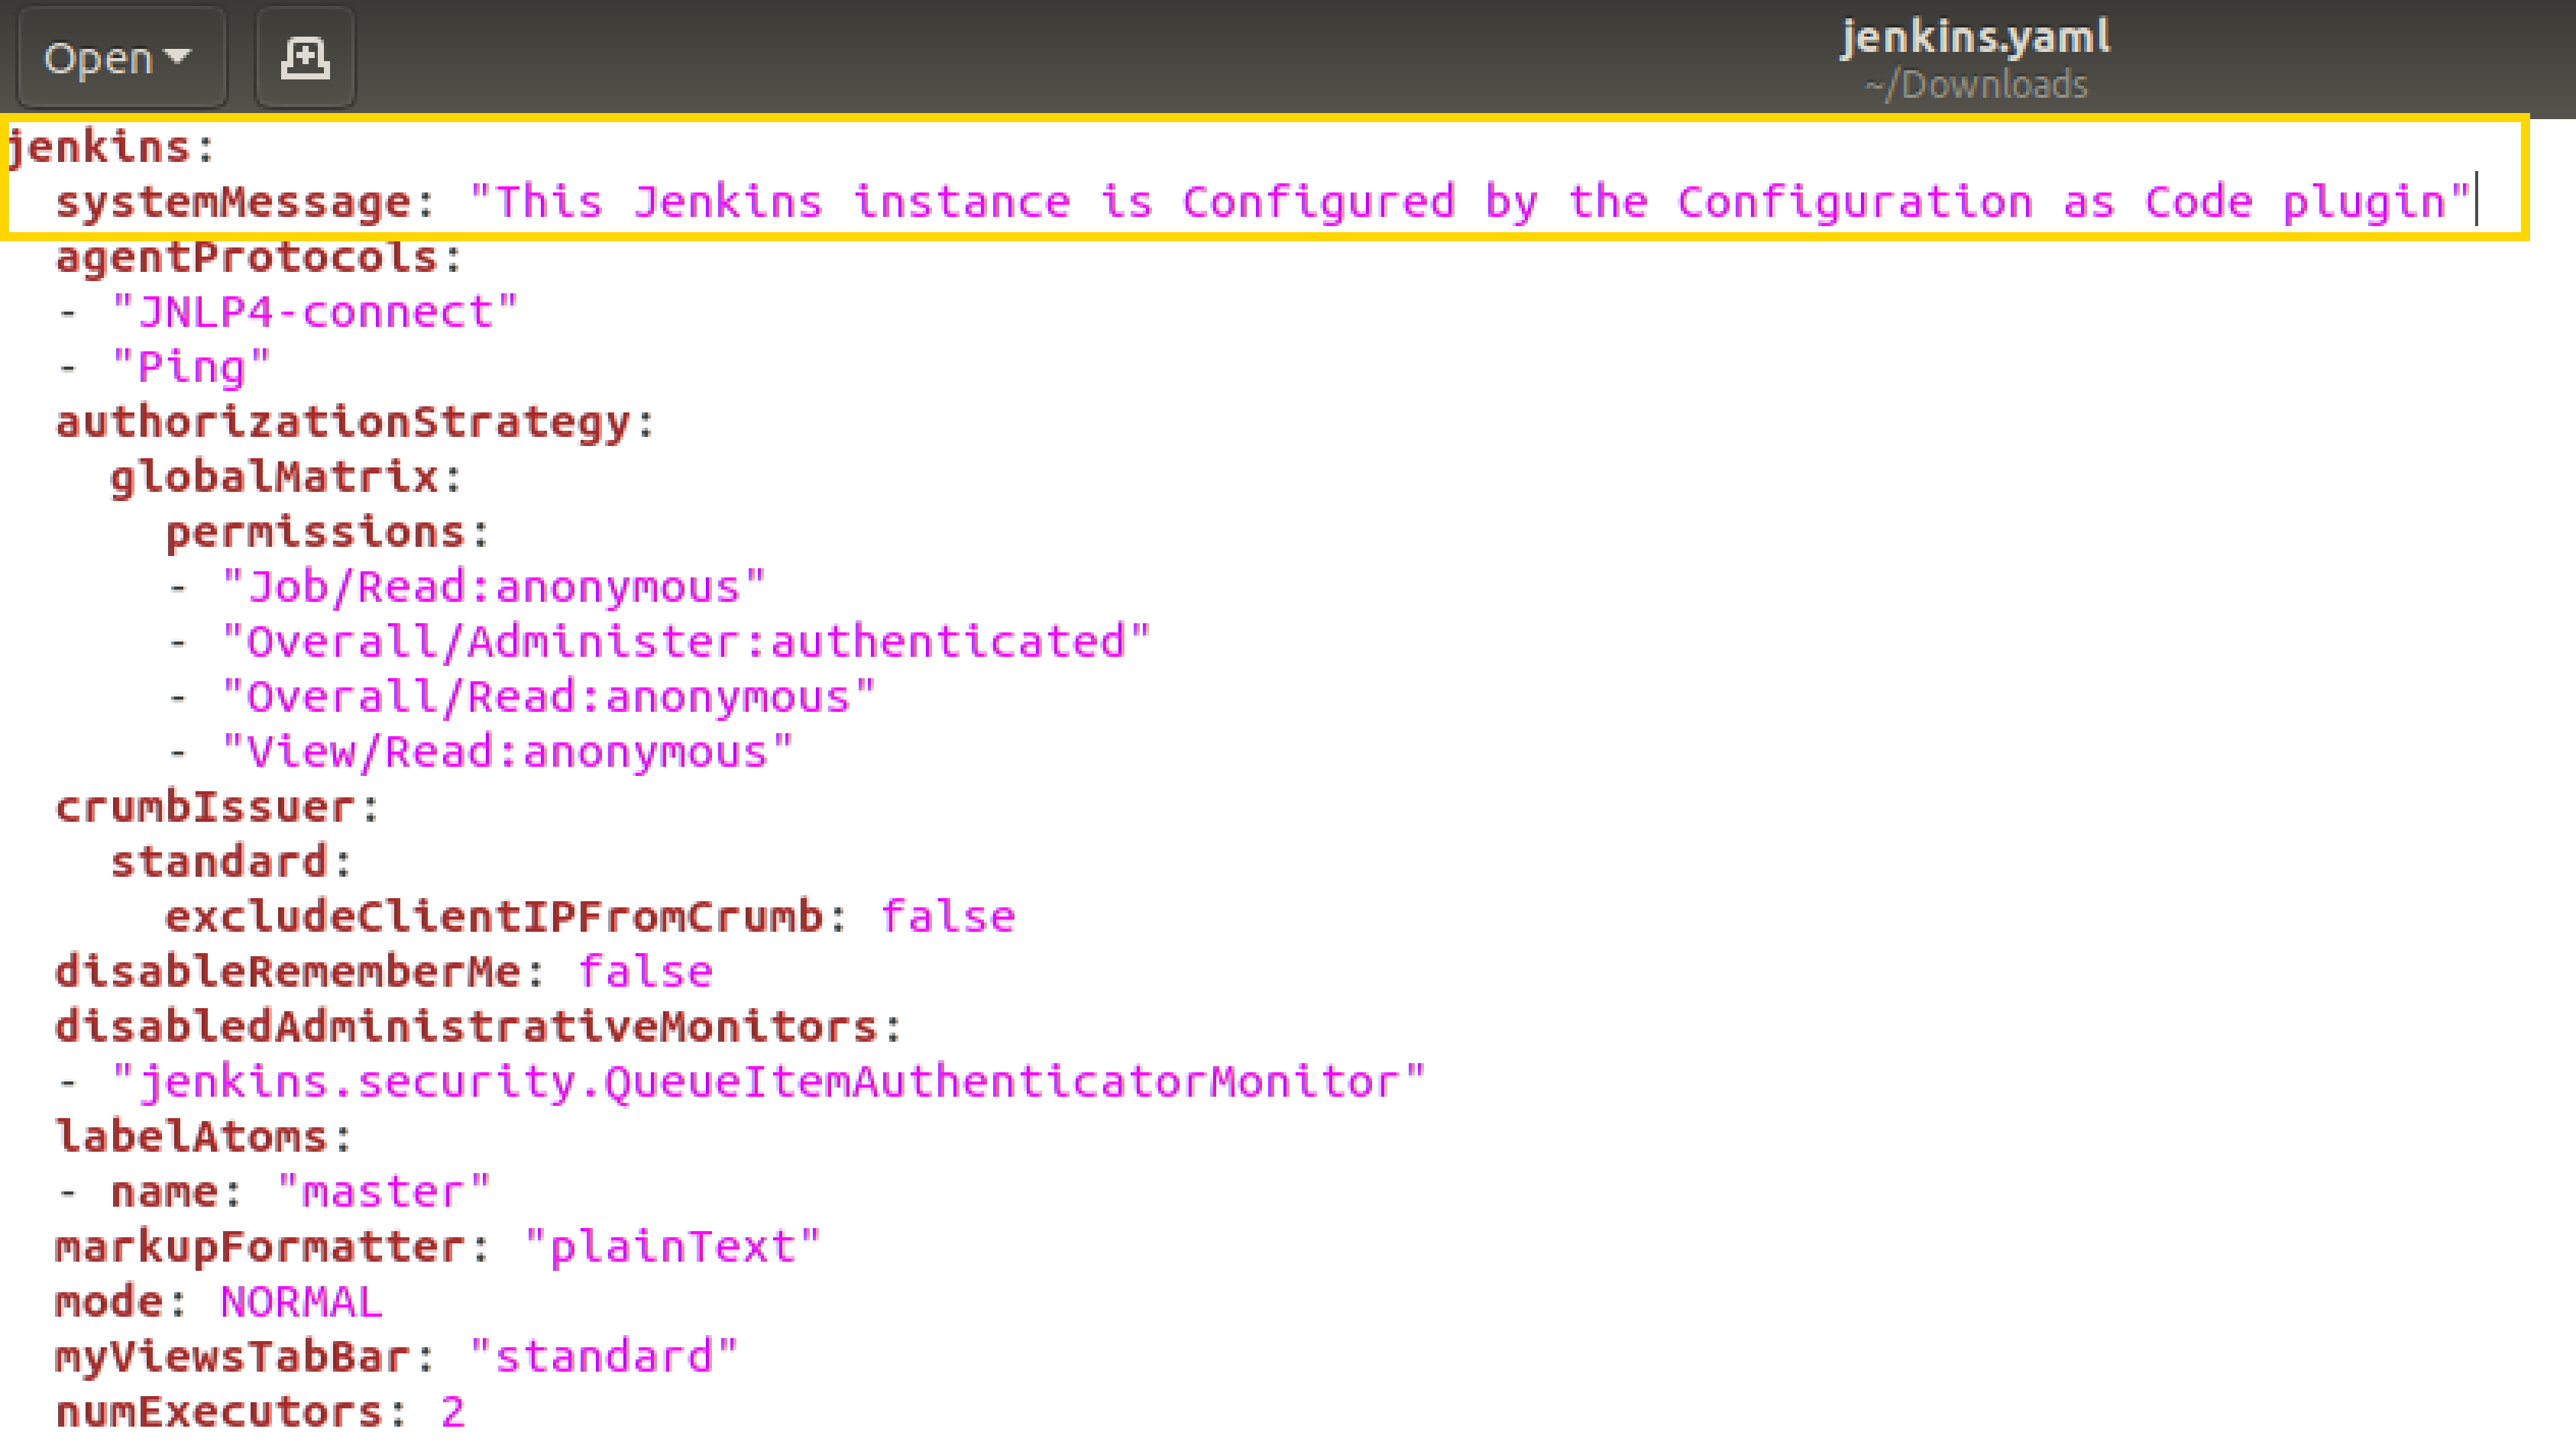
Let’s change the
systemMessagefield to:
-
Reload the existing configuration to apply the system message change
-
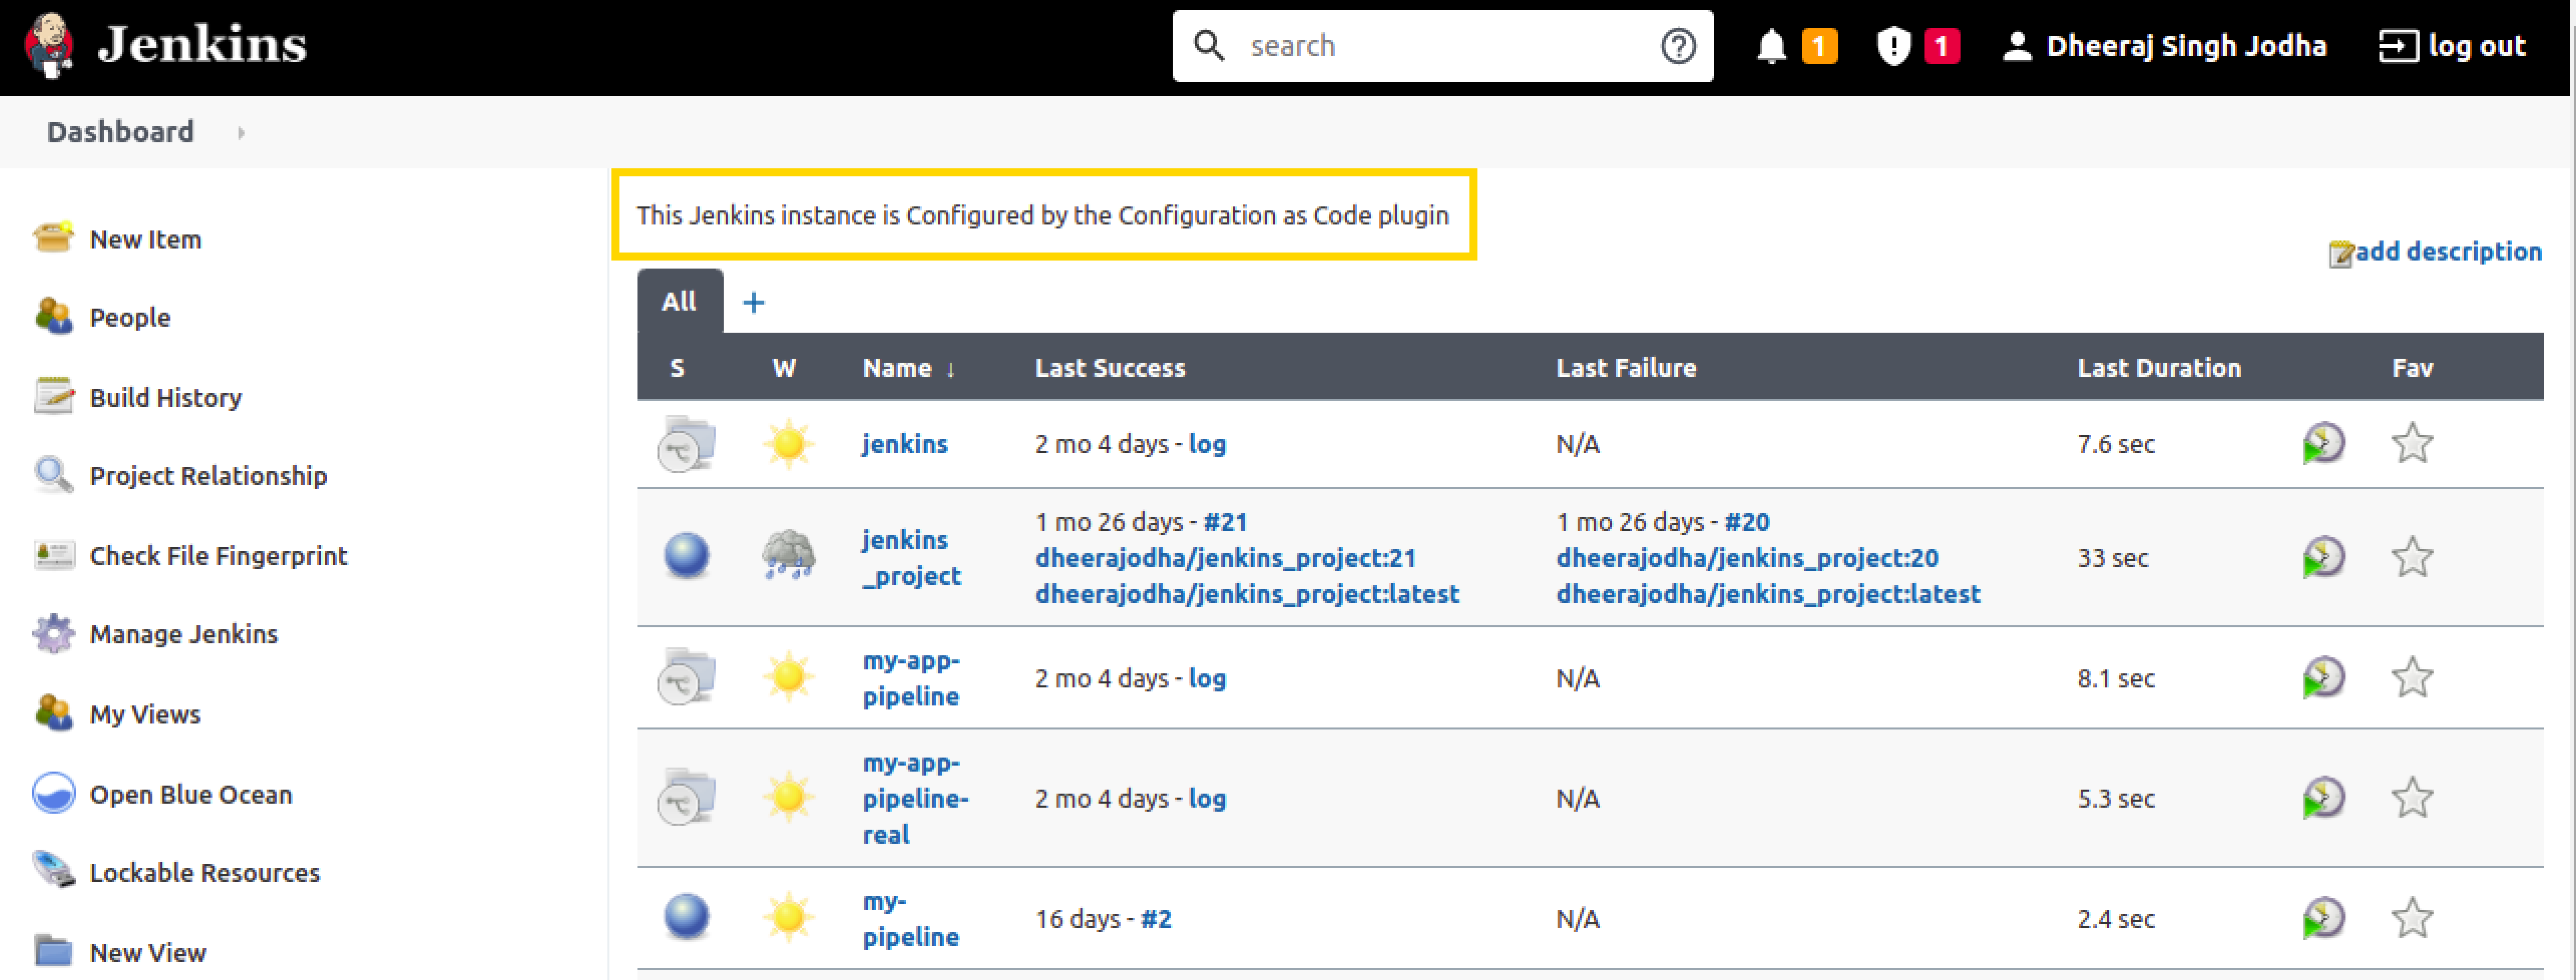
Now, go back to the Dashboard and you can see the updated System Message on top:
-
This file will be used later to configure the plugin using JCasC.
Configure the plugin on the UI
-
For this demo, install the
View Job Filtersplugin. -
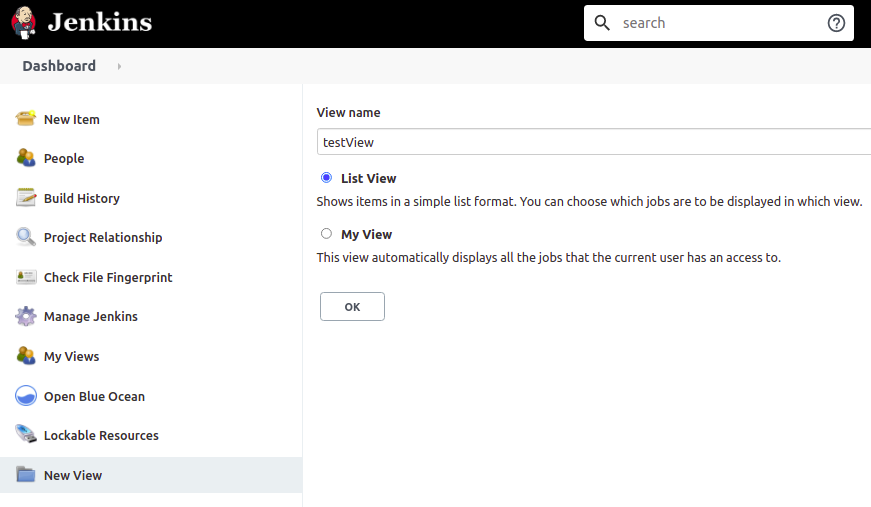
Let’s create a view by clicking on the
New Viewoption on the left side of the Dashboard. -
Give it a name (say, “testView”) and set its type to
List View, and click on theOKbutton.
-
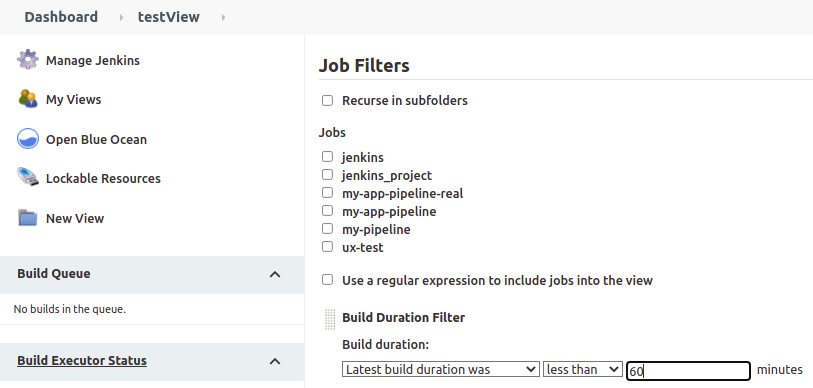
Now click on
Add Job Filterto add any kind of filter, so let’s selectBuild Duration Filterand fill the field with any value (say, "60" minutes),
-
Click on
Apply>Save. -
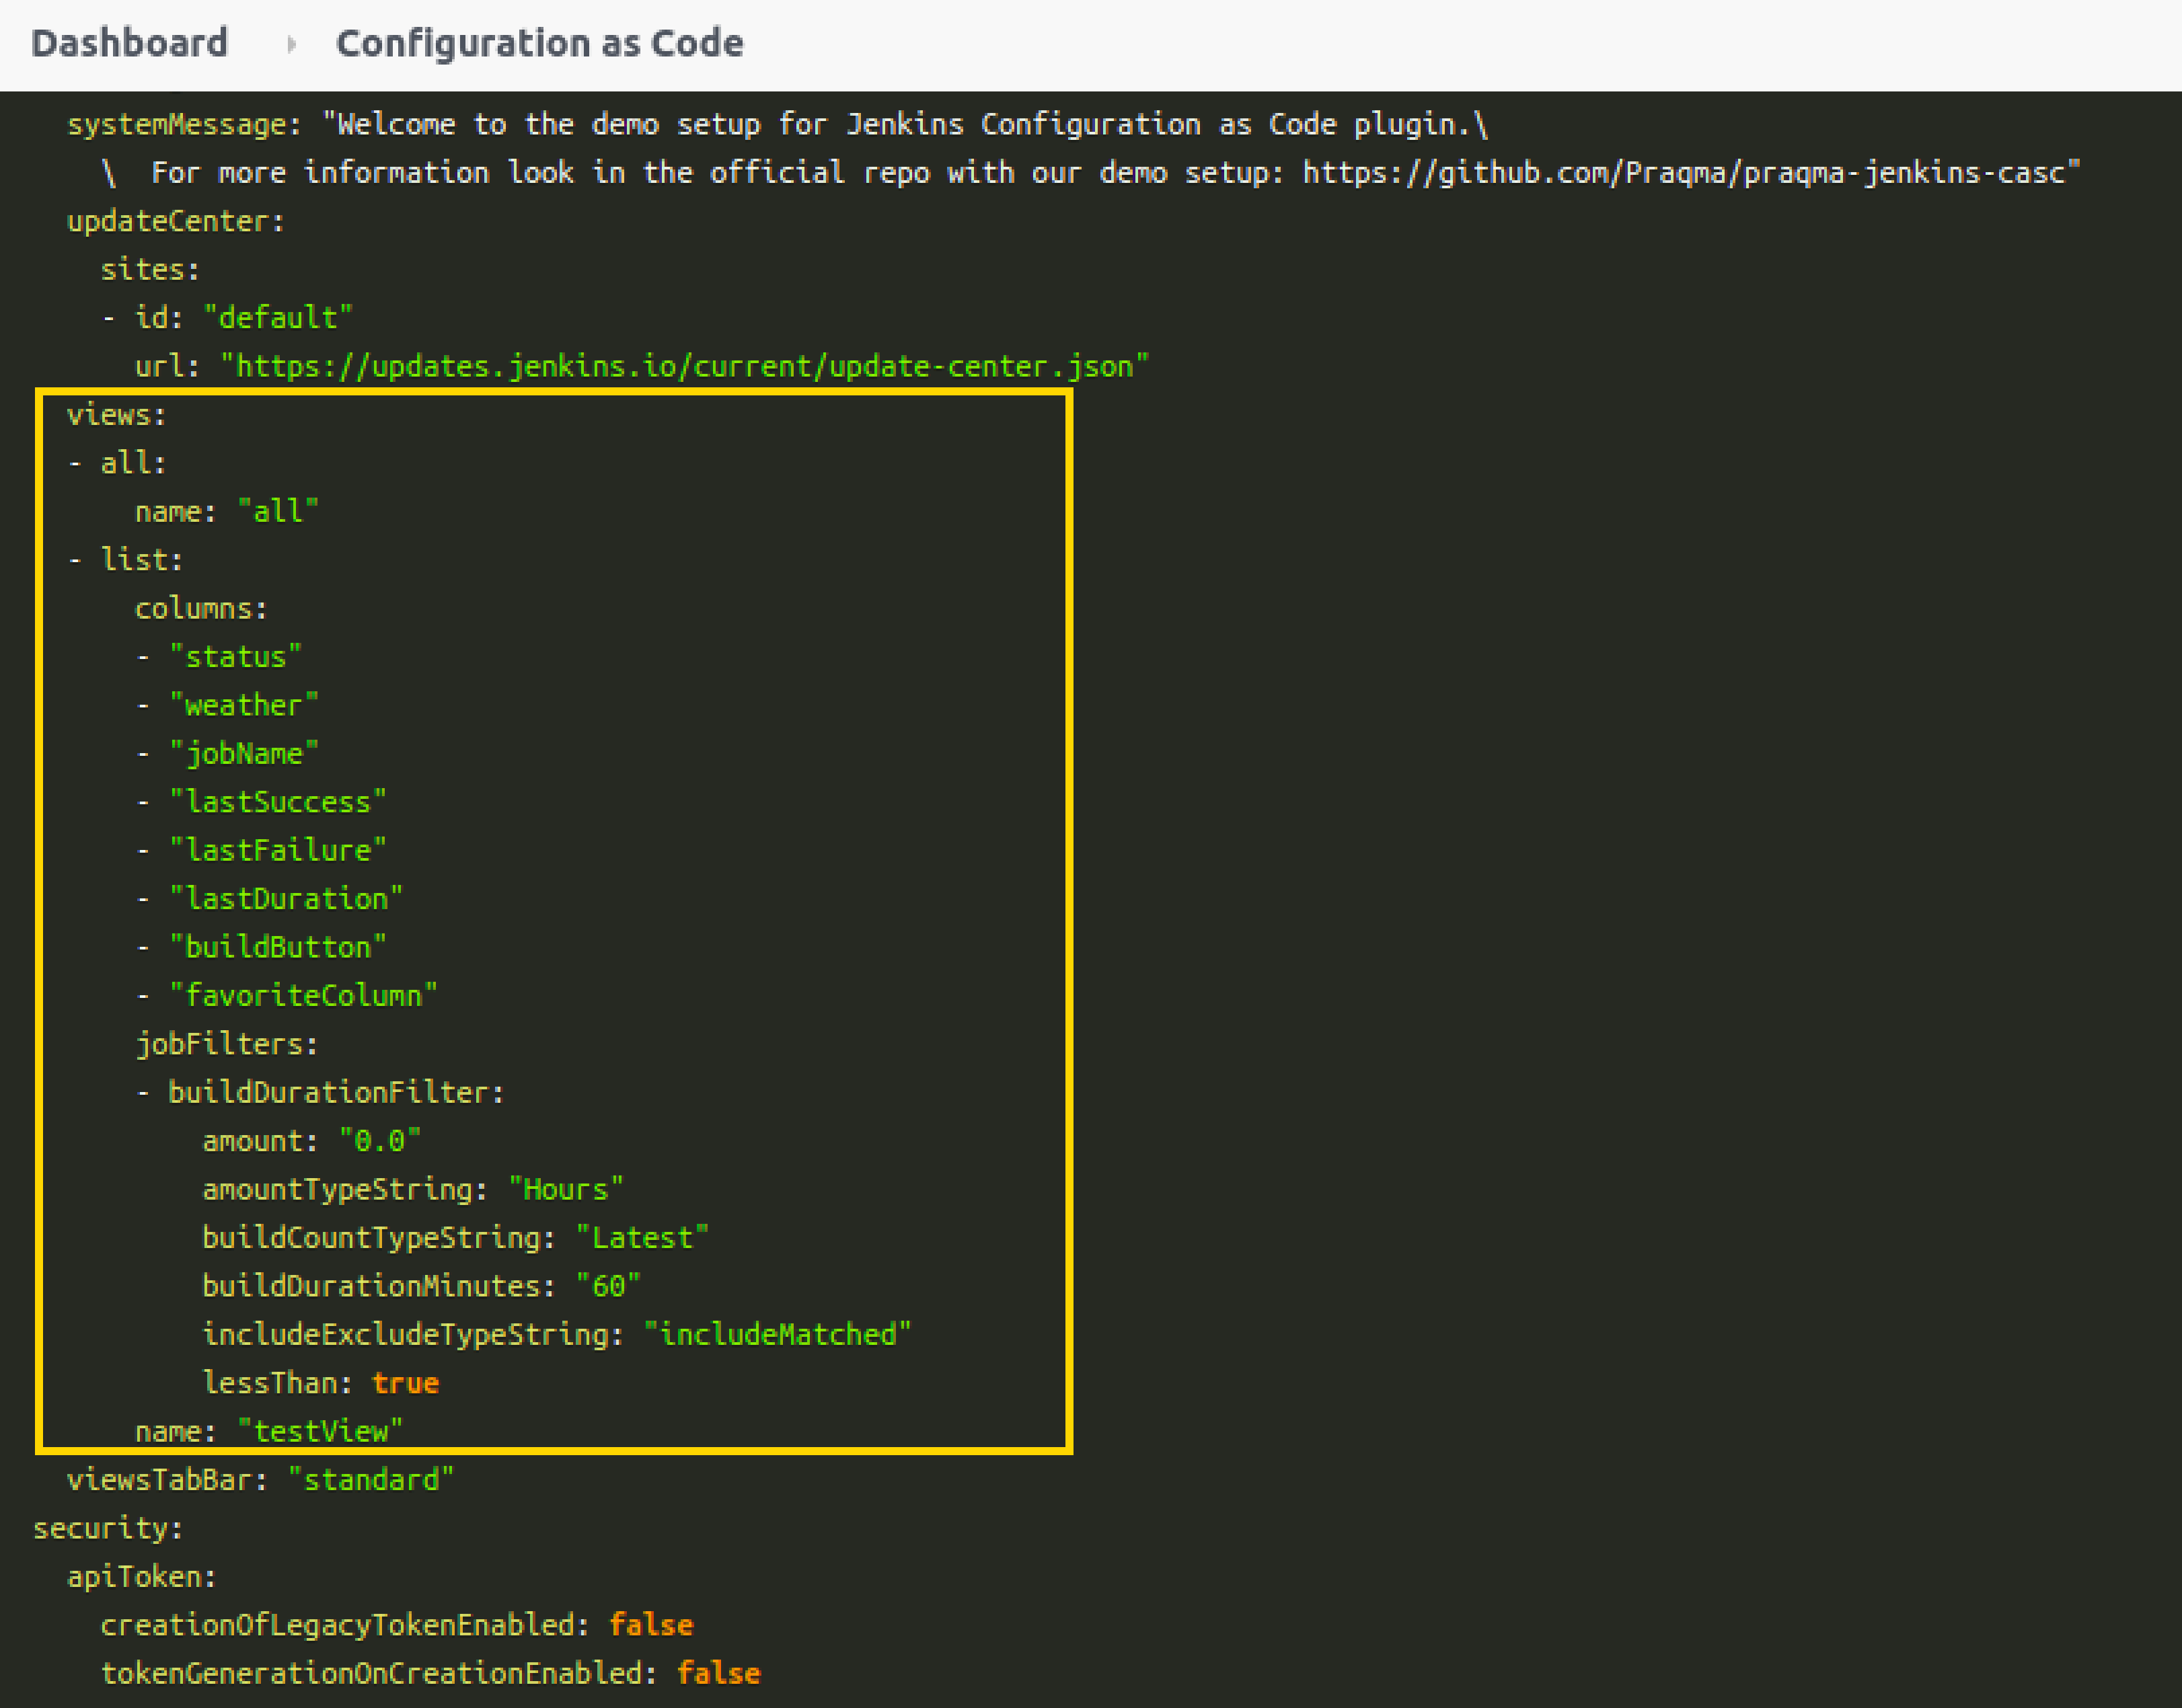
To view the full configuration, check out your main
jenkins.yamlconfiguration file, by clicking onManage Jenkins>Configuration as Code>View Configuration -
Go to the
viewssection in this YAML file to see details related to the view,
Download the Configuration
-
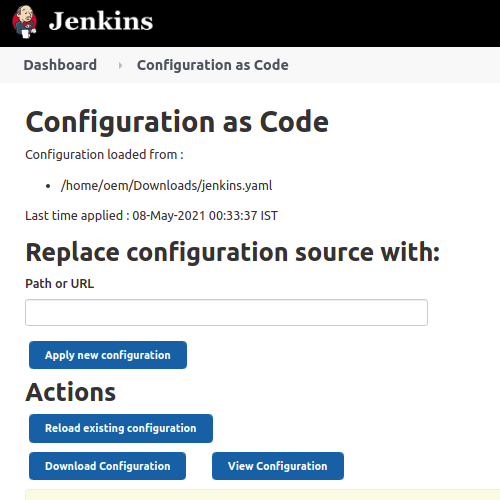
Now that you have successfully configured your plugin by UI, let’s download the configuration by going to
Manage Jenkinson the Dashboard, then click onConfiguration as Codeunder "System Configuration". -
Now click on the
Download Configurationbutton to save the configuration file locally.
Update JCasC file locally
-
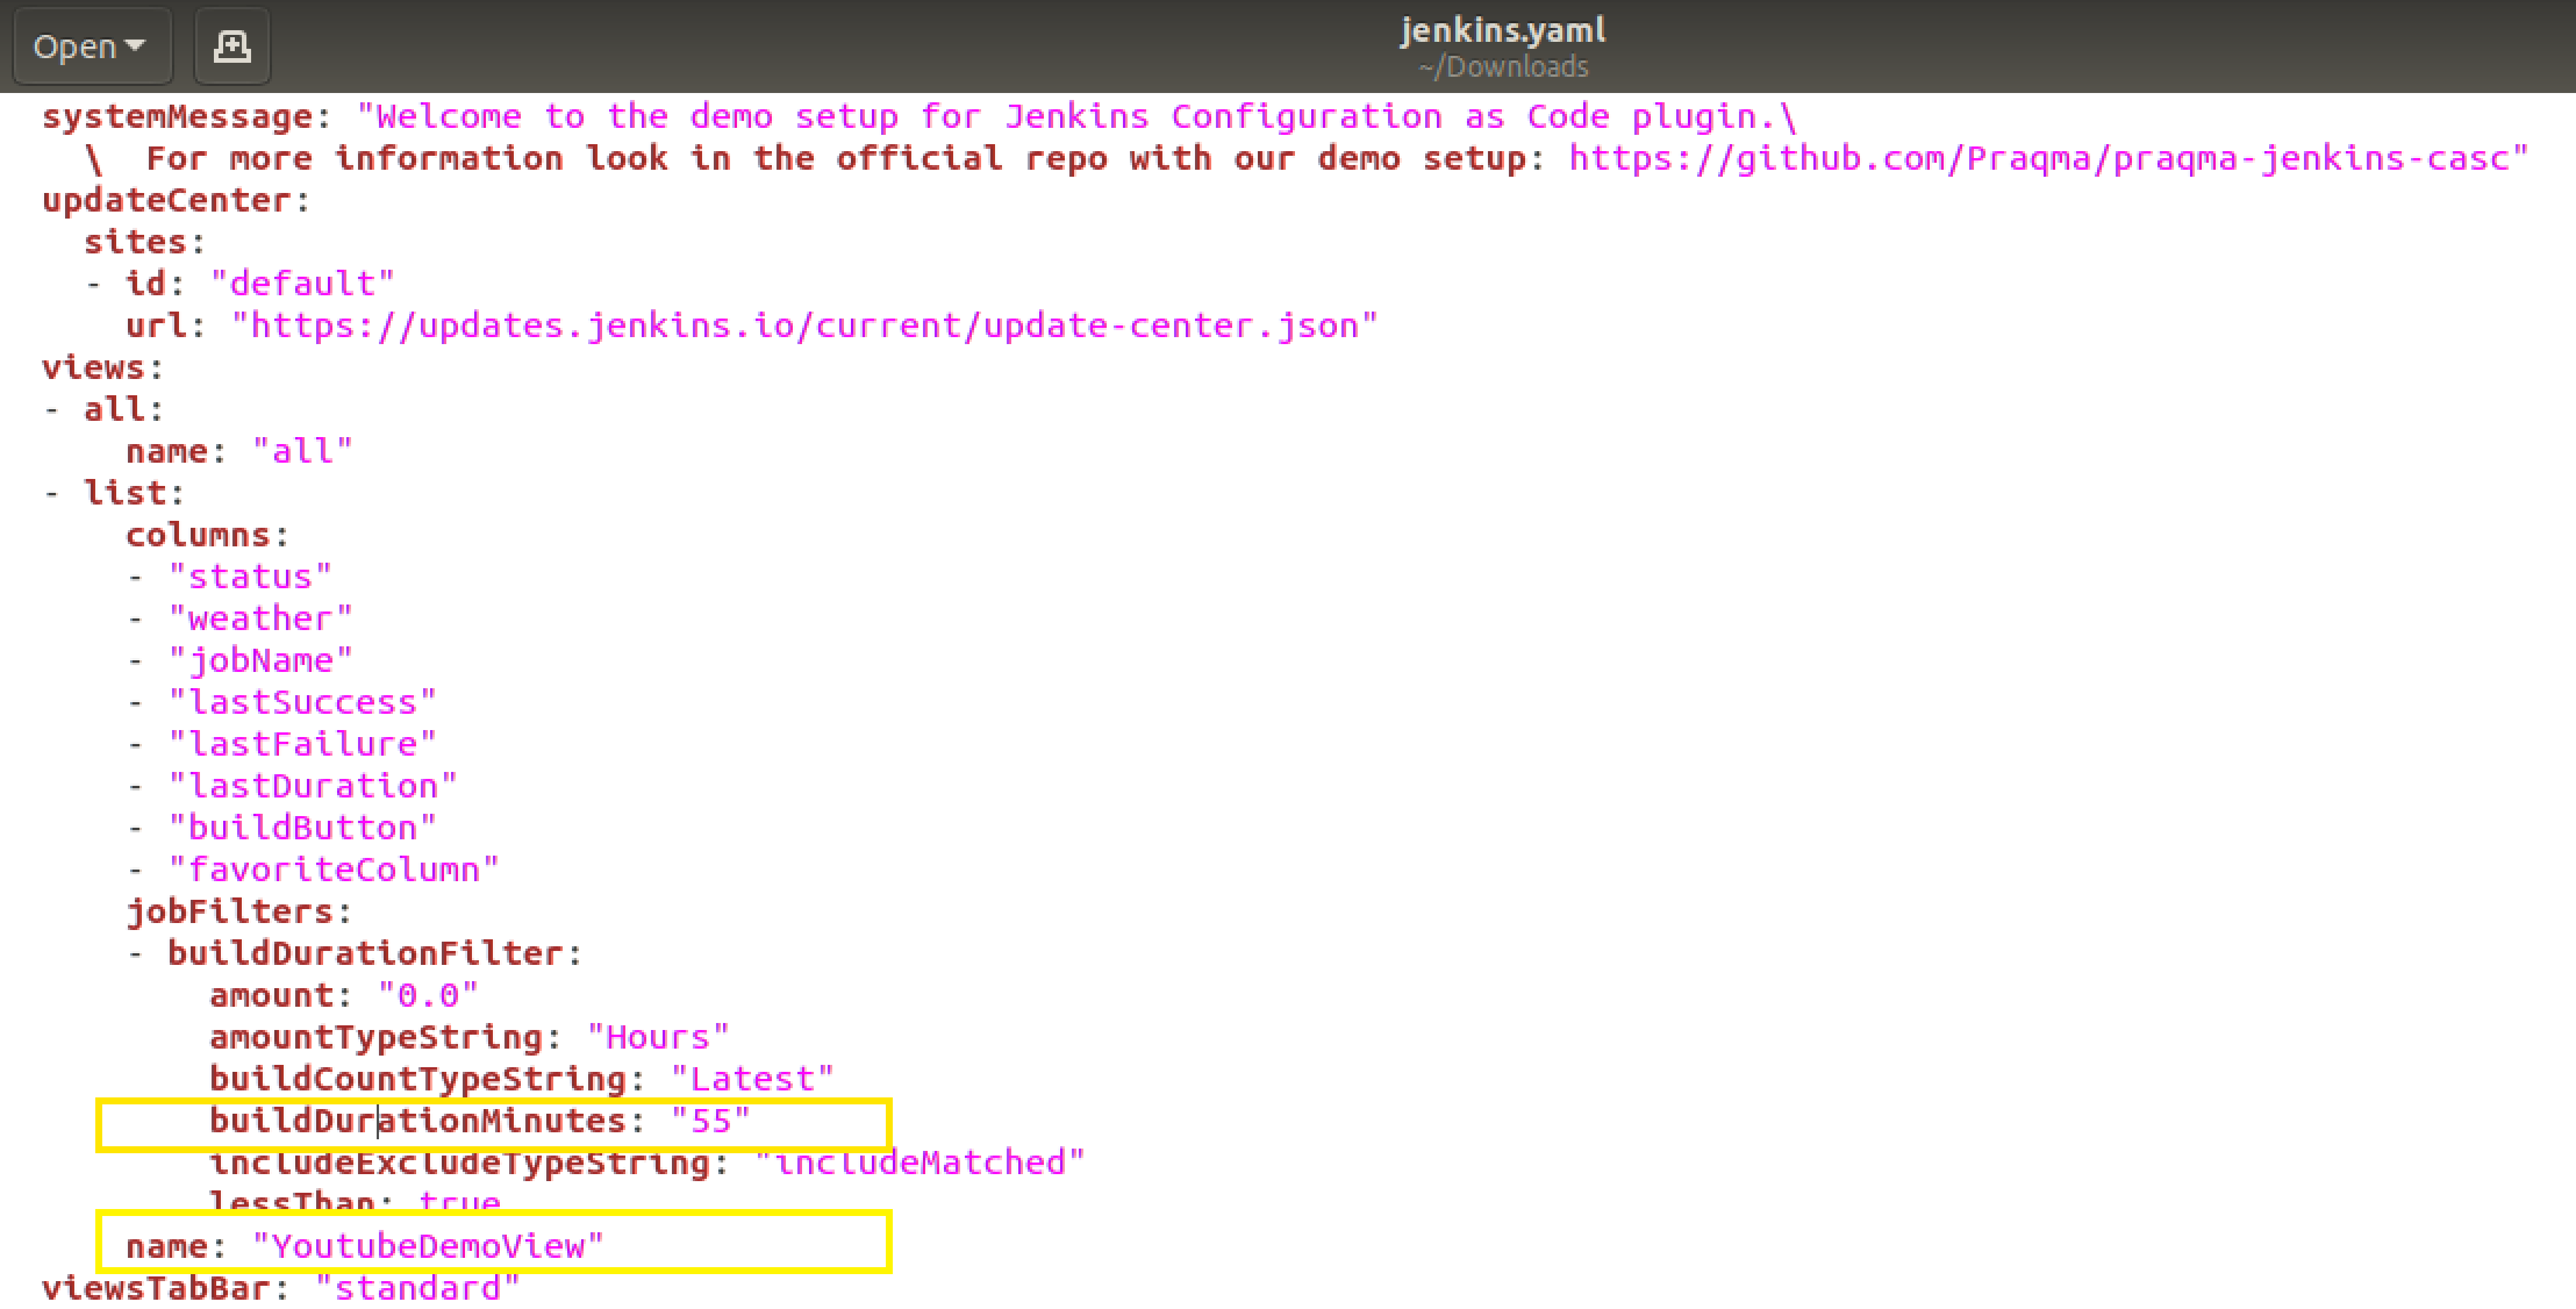
Add some changes in your downloaded copy of the
jenkins.yamlfile, to see those changes being automatically reflected on the UI. -
For demo purposes, let’s change the
nameto “YoutubeDemoView” and set thebuildDurationMinutesas "55".
-
Save the file.
Load the jenkins.yaml file on the Jenkins server
-
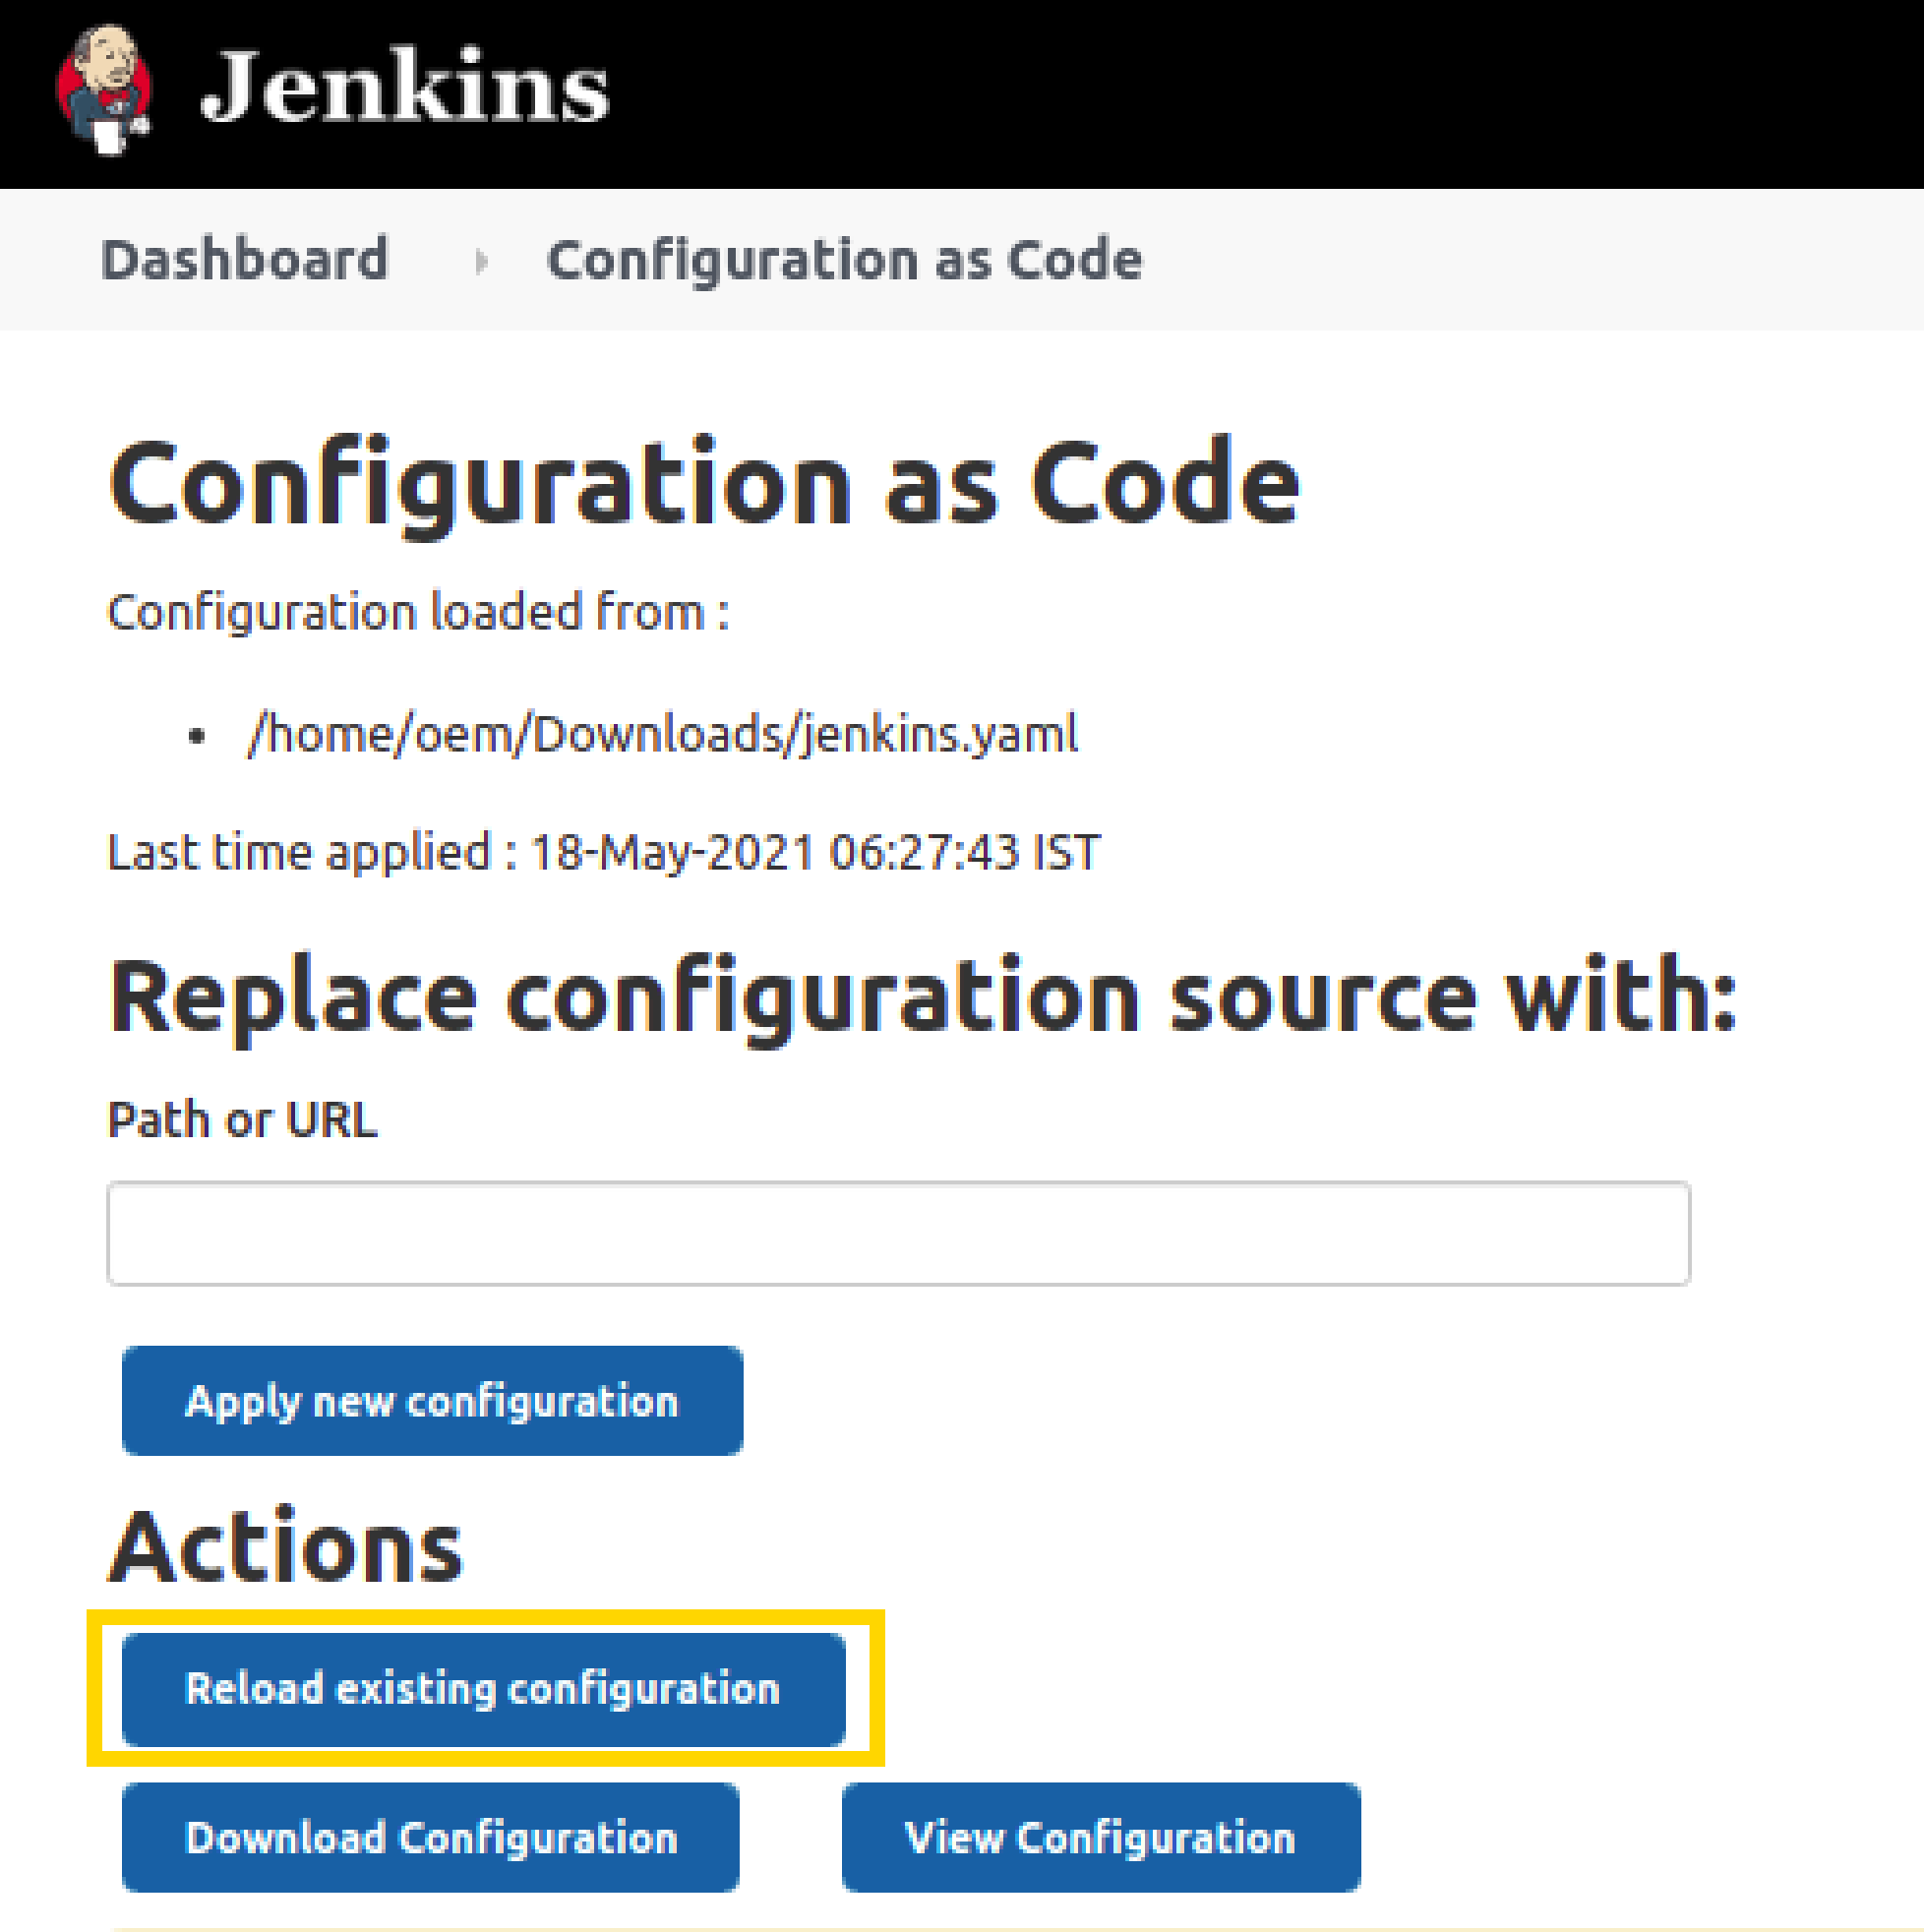
Now to reflect the local changes done in the
jenkins.yamlfile onto the Jenkins server, click on theReload existing configurationbutton.
Verify the changes on the UI
-
Go back to the main page by clicking on the Jenkins logo on the top-left side.
-
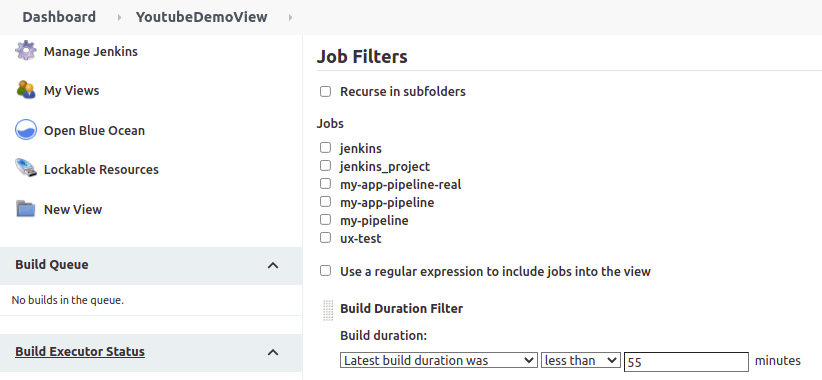
And you will notice that the name of your view has been changed from "testView" to “YoutubeDemoView”,
-
And the field value of
Build Duration Filterhas been changed from "60" to “55”. -
These two are the exact changes that we did locally in our
jenkins.yamlfile.
Congratulations! You’ve successfully configured a plugin (“View Job Filter”) automatically with the help of the “Jenkins Configuration as Code” plugin! You can repeat the same process for other plugins as well.
About the author